
Urban Vegetable Gardening: Container Building (March)

March 2018: The main bed (right) is starting to fill up with broad beans, garlic, onion & shallots
March is in full swing and technically Spring starts towards the end of the month. Let's hope the weather reflects that! There's still not too much to do in a vegetable garden, as most people will be sowing seeds indoors. We don't have much space indoors, so this month we're making sure our outdoor space is ready to sow seeds for next month.
The challenge is to grow enough fruit and veg to rely only on the garden - for three continuous weeks. We want to build a vegetable and fruit garden that will supply all of our fruit and veg, or as close as possible, for three weeks - from fruits to greens, herbs and edible flowers. The plan is to have no need for any store- or market-bought vegetables or fruit. This blog series will detail each month's activities in the hope that we can encourage you to start growing your own food at home, no matter how small the space.
It's a big ask and a big challenge for a small urban garden that doesn't receive full sunlight - but we're confident we can give it a go. This month, we've been focusing on getting the space ready and that means building planters from recycled wood to give us more 'ground space'. We don't have much uncovered ground in our garden as it's a small concrete garden but that doesn't mean we can't grow things!
The space
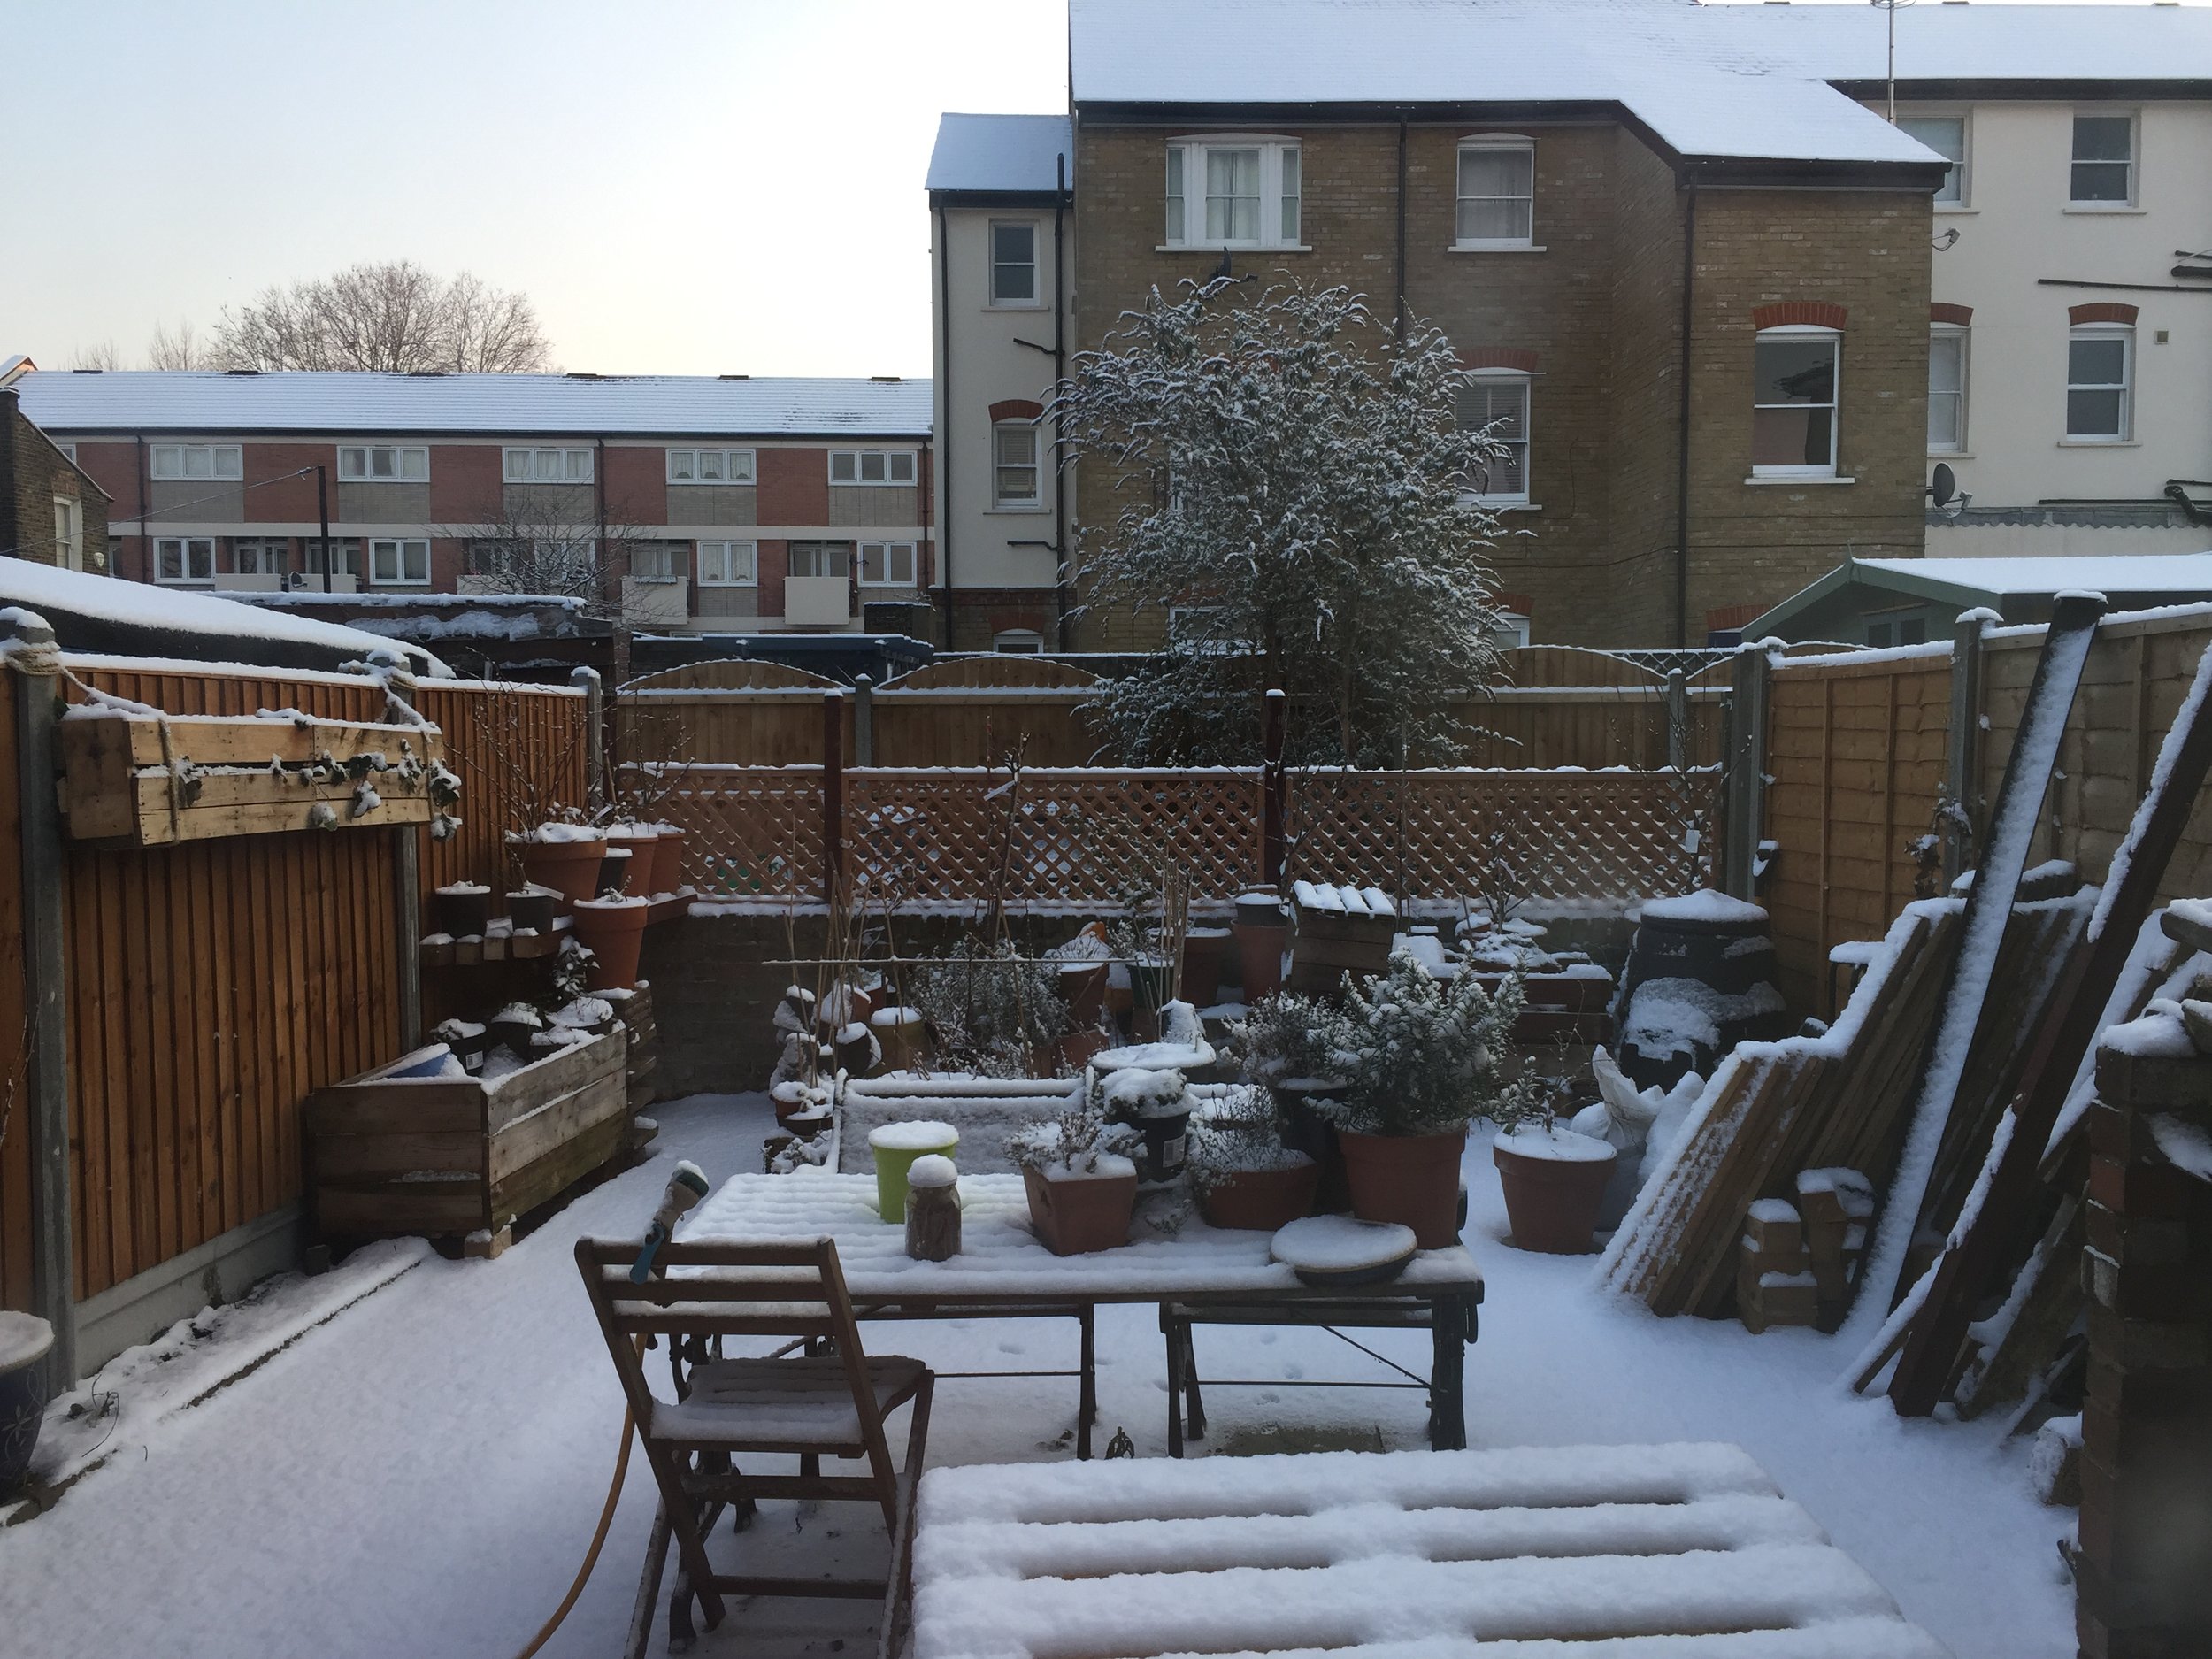
Snowfall is rare in London, so before the 'Beast from the East' we made sure to bring in our citrus shrub along with our other Mediterranean plants.
Follow the Sun
We've shuffled the back row of dwarf trees (barely visible in the above photo). But we're planning on lining up the trees against the back south-west-facing fence, where there's the most sunlight. The trees - two cherries and a plum - are sun lovers and once their flowers are in bloom it should make a great backdrop for a spring garden.
As mentioned before, we want to keep our costs as low as possible while still producing quality food. We aim to use as much recycled and recyclable material as possible, and last month we found/bought a bunch of high-quality shipping pallets, getting a great deal from them. They're really important to us as we have a patio garden with poor soil and lots of concrete. We're going to build a group of heavy duty planters to expand our growing space from the single bed and solo planter in the photo above to a cluster of planters around the edge of the garden.
DIY planter building
Our organic vegetable garden is all about keeping costs low and quality and cropping high - so naturally we're going to need more space. To help with this, the planters will provide us with valuable bed space around the edges of our small garden. Container planting is a great way to start growing fruit or vegetables - especially if the wood is sourced for free.
Equipment:
Wooden Shipping Pallet
Crowbar
Cordless Drill (or hammer)
Screws (or nails)
Gloves
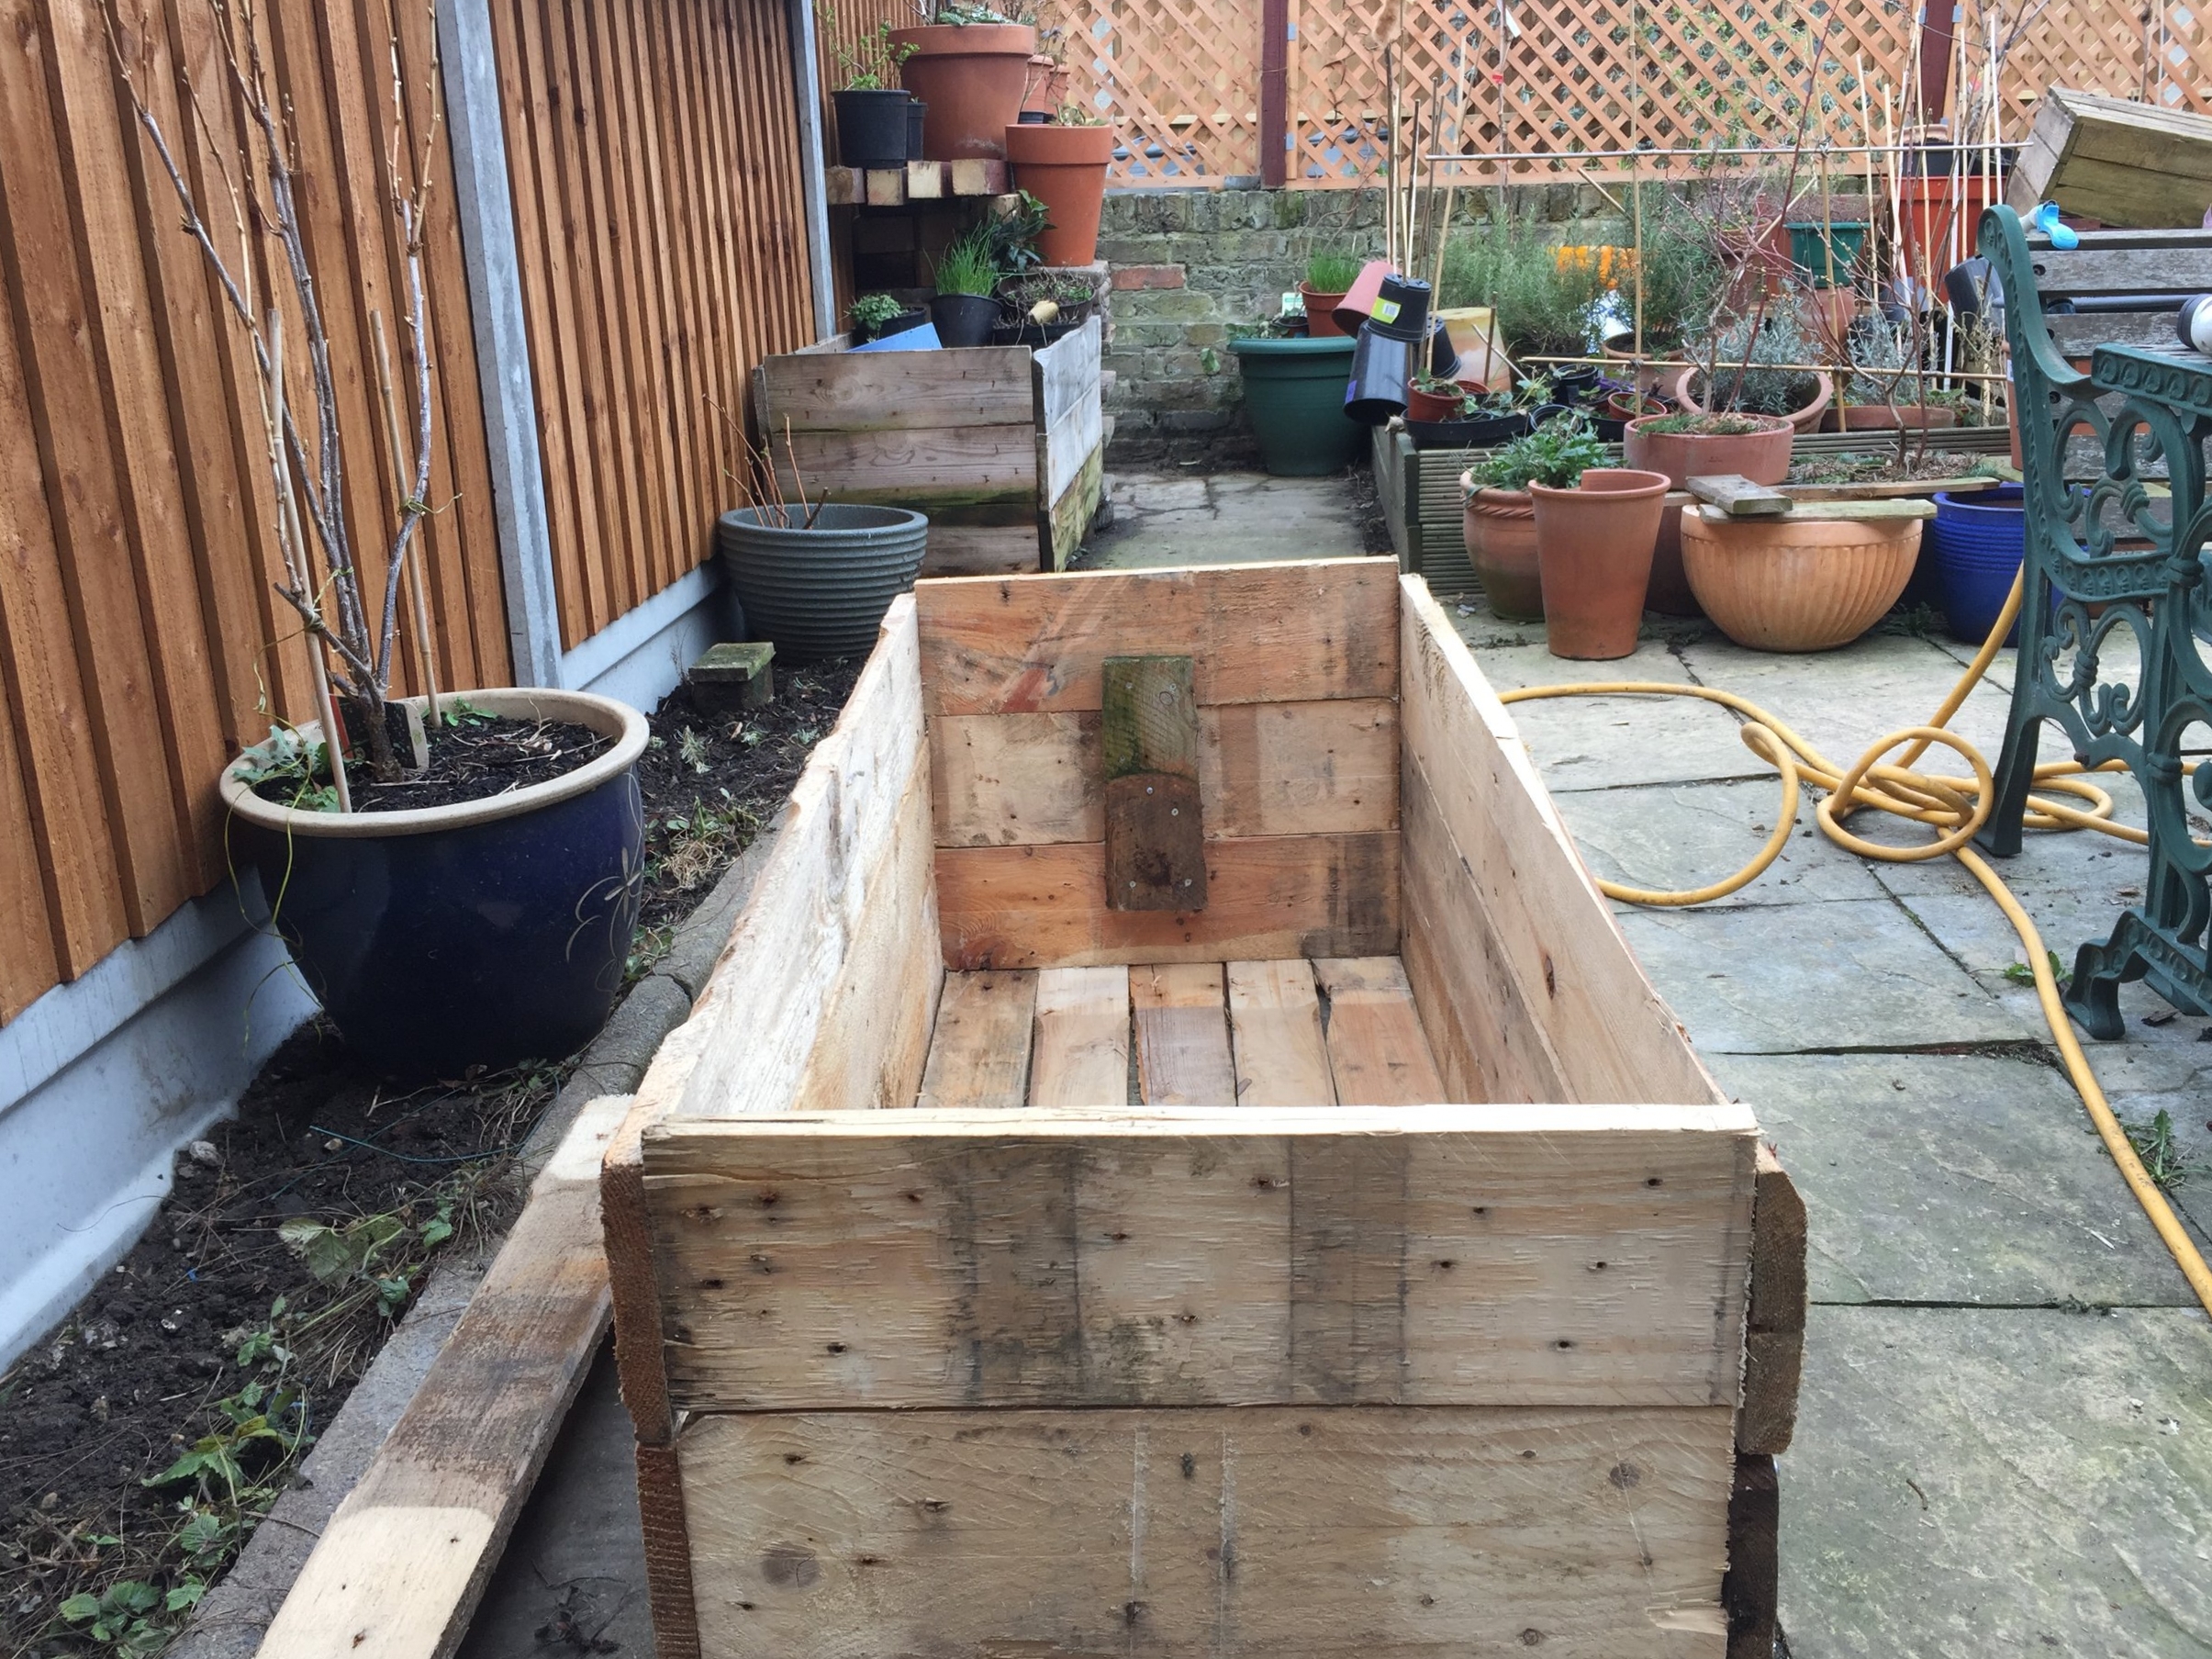
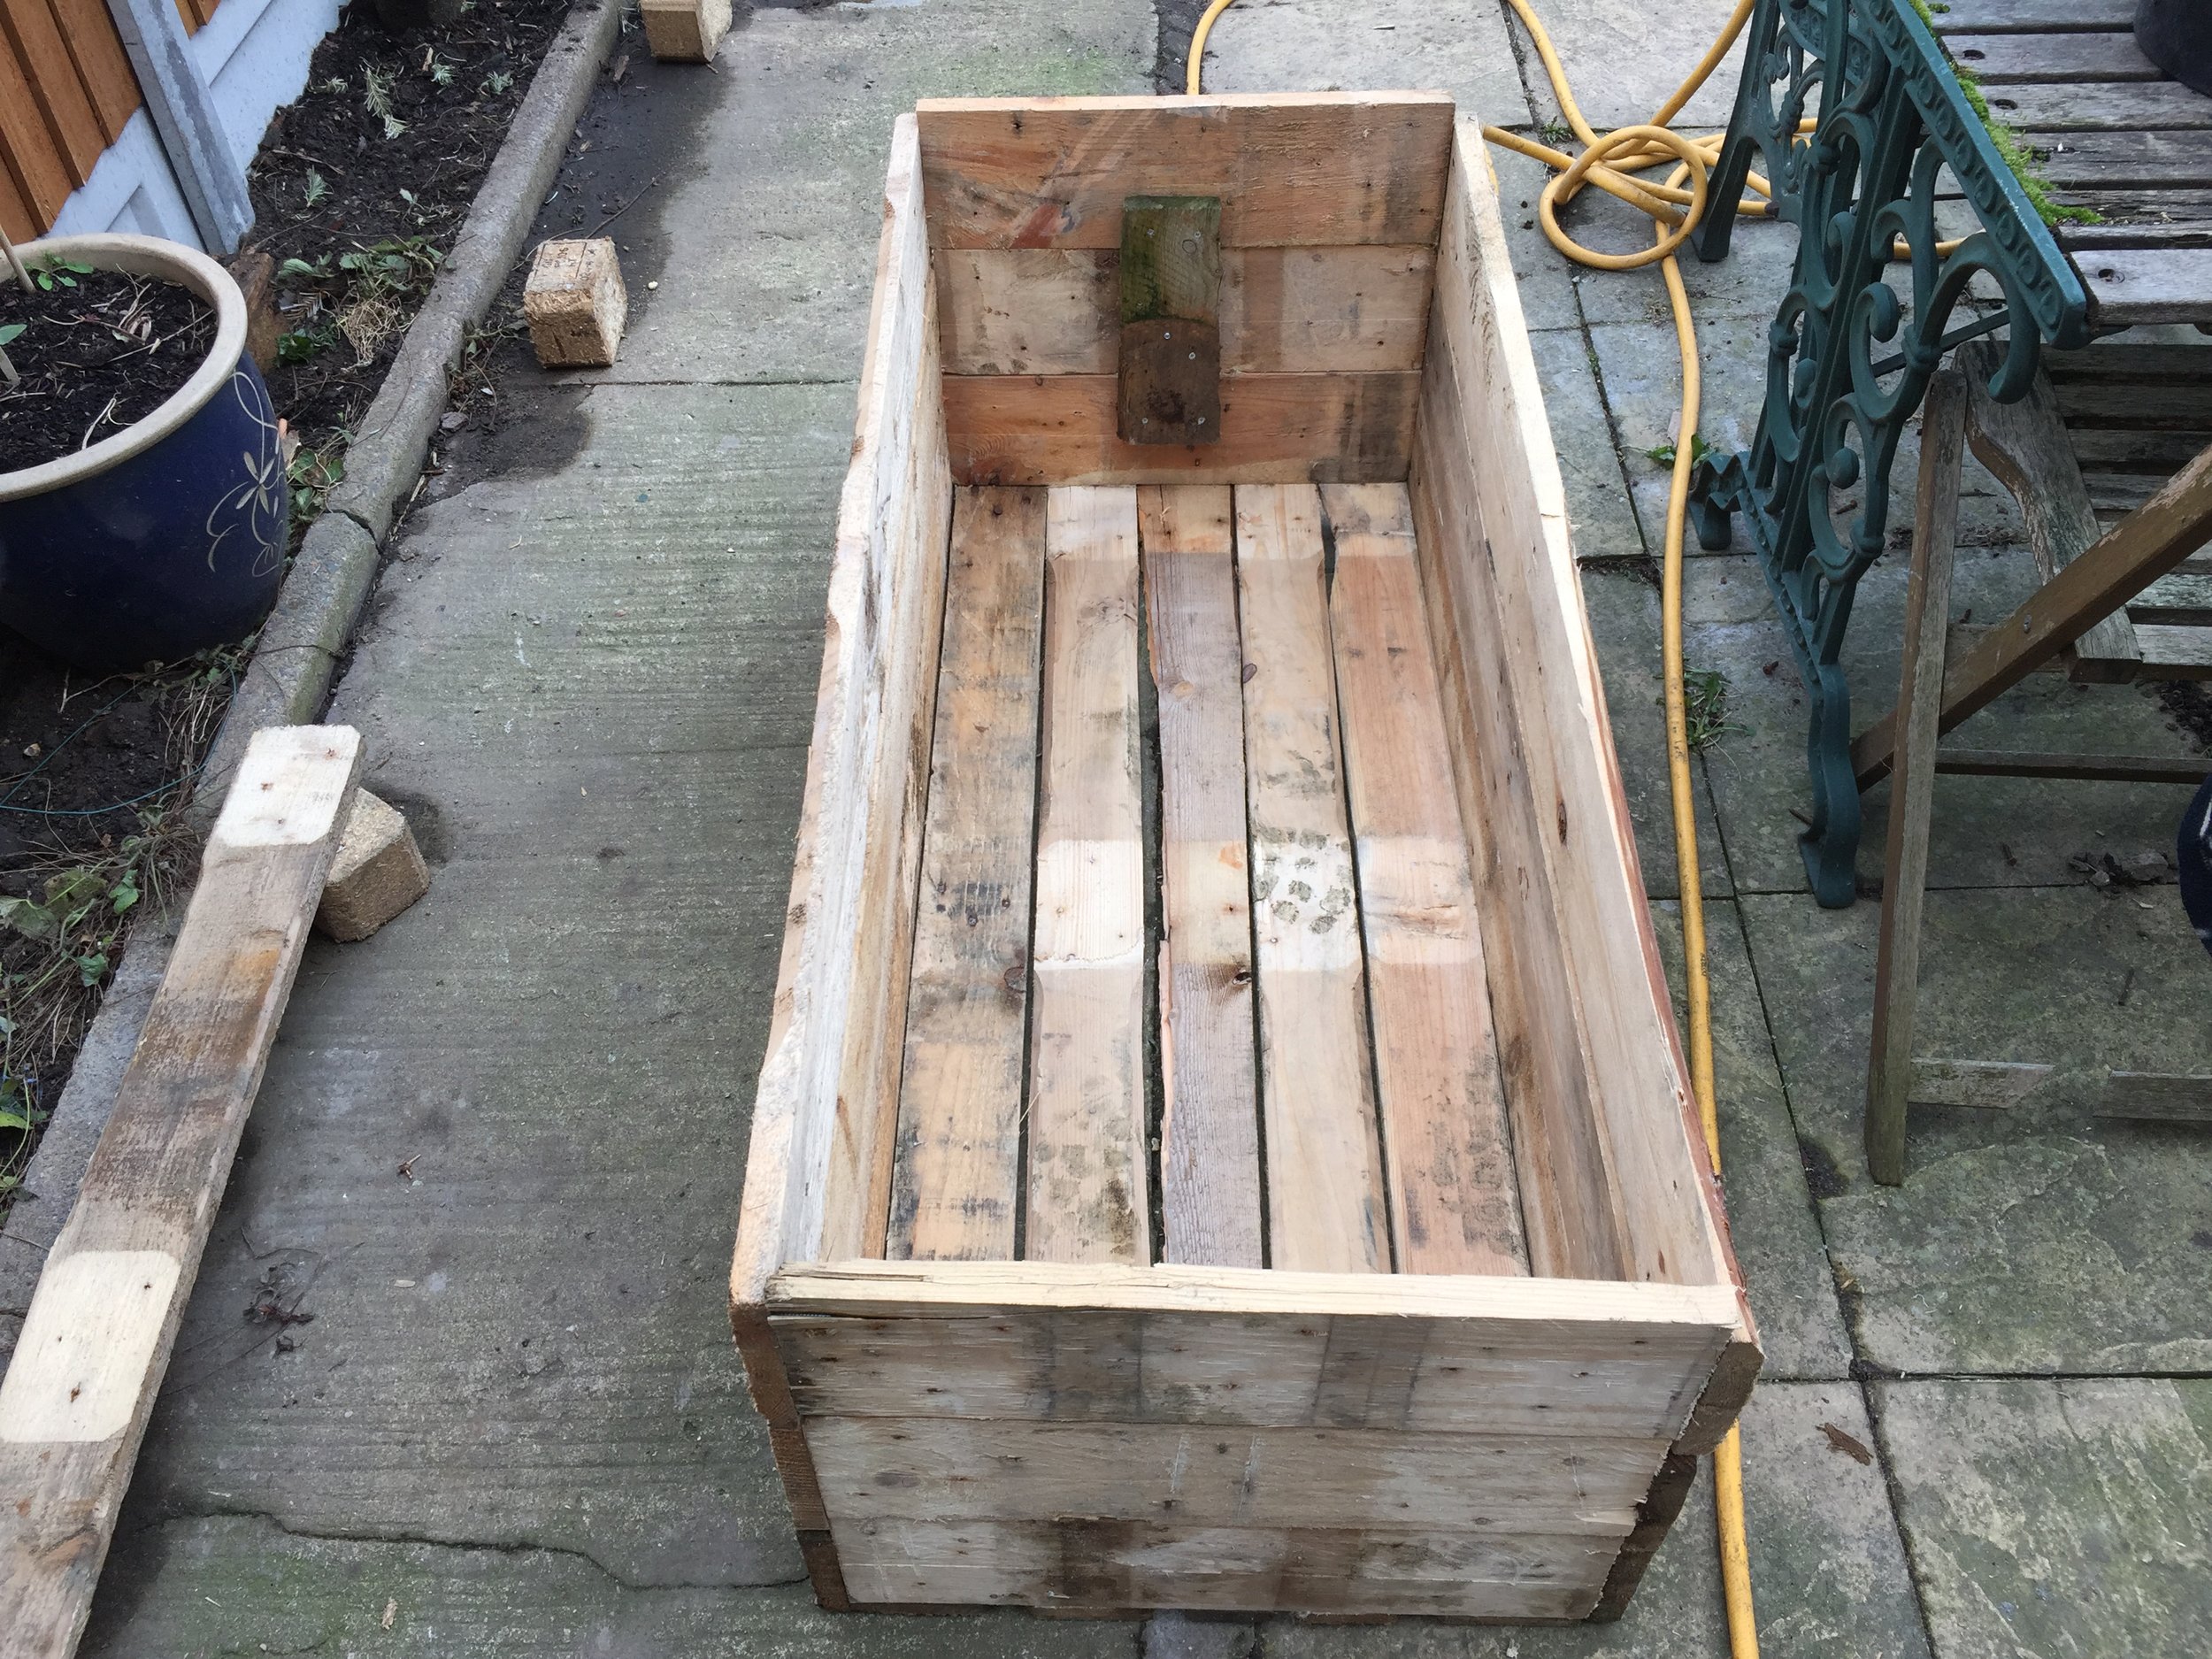
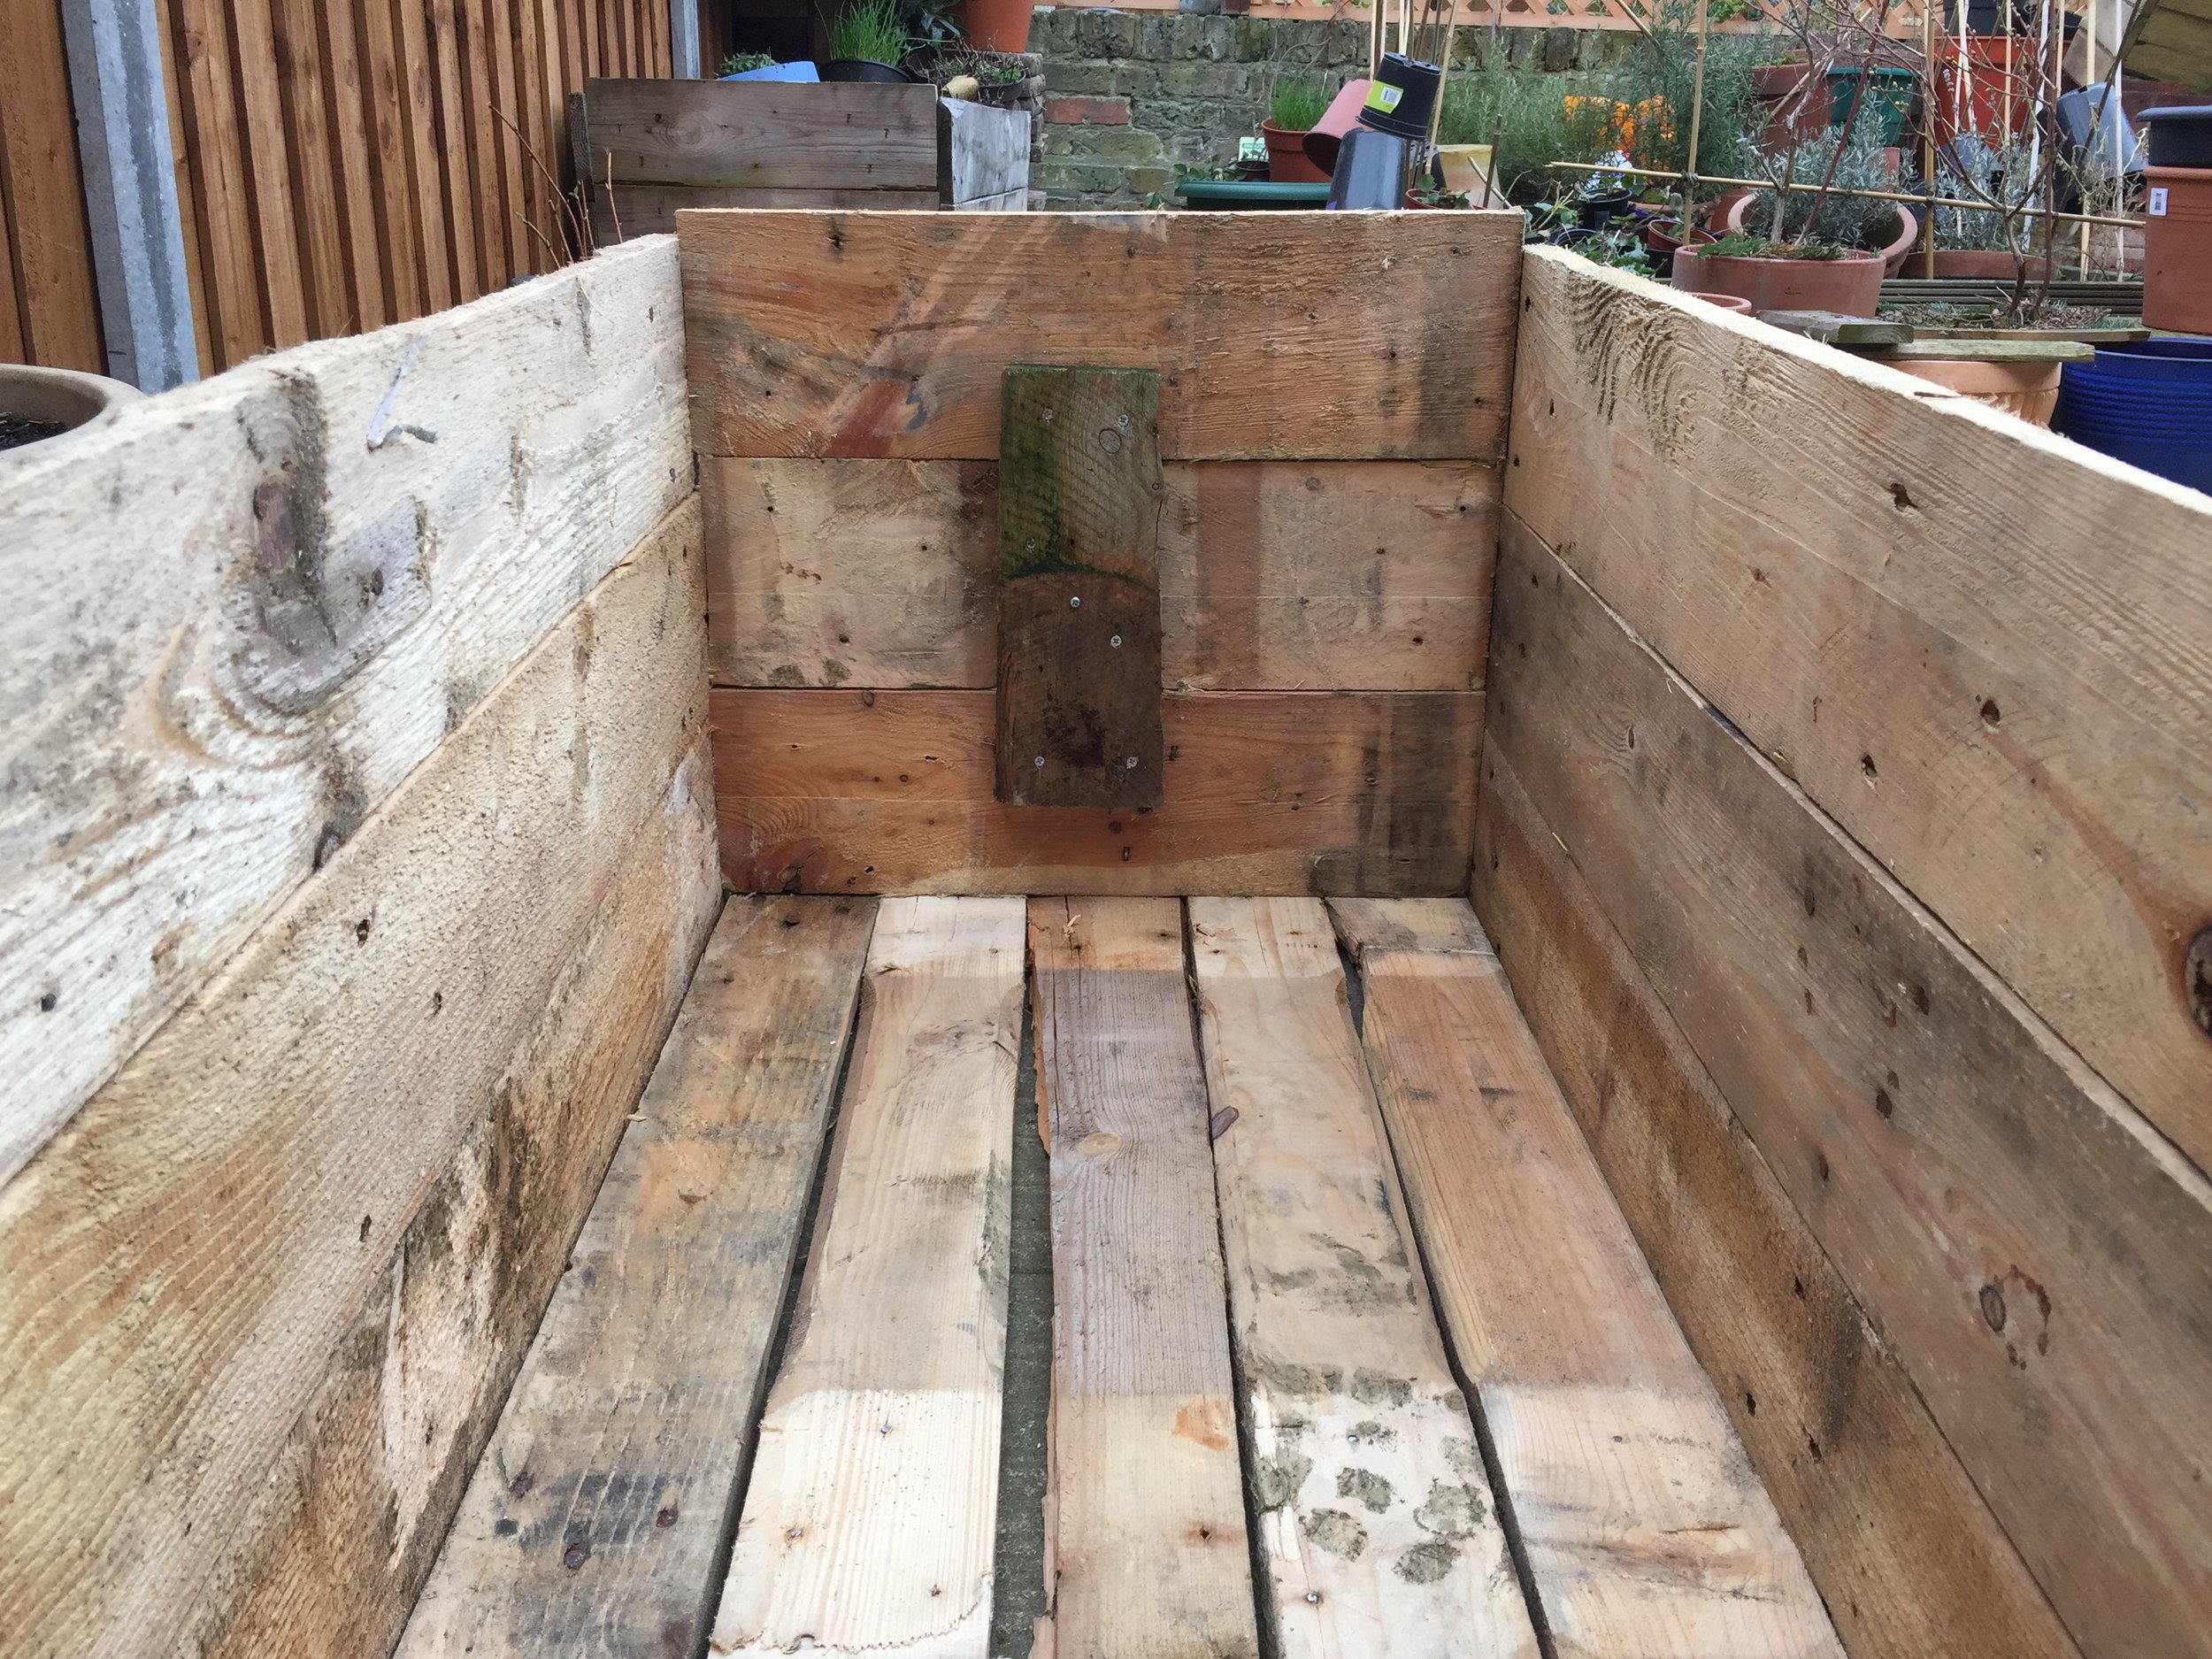
The dimensions of our DIY pallet planter are 120cm x 50cm x 45cm - this coincides with the dimensions of the pallets that Peppe took apart last month with a crowbar and hammer. (At 9 months pregnant I was just watching from the window with a cup of raspberry leaf tea!) You can learn how to take apart pallets here. (If you have a reciprocating saw, it's much easier on the EPAL pallets, which are the heavier duty pallets we collected.)
The dimensions above give us a nice size and a good depth in case we want to grow any root vegetables. The build is nothing special and quite rough around the edges - we aren't pros at this! There aren't any rules here; we used a power drill, screws and the reclaimed timber from the shipping pallets. You can likely use a hammer and nails instead, but the cordless drill makes it a lot easier. Figure out a shape or size that suits your space and then, similar to a giant Lego set, take some time to piece everything together, building the sturdiest planter you possibly can. Long screws are important here as they really hold everything together well. Peppe followed this YouTube video as the basis of our build.
The slats on the bottom have slight gaps in between - this is to encourage drainage so that our veggies don't have soggy roots, which can cause them to rot and die. This is really important! The planter we made last year had wider gaps, using four slats on the bottom instead of five, but we found that it dried out very quickly in hot weather.
Taking apart the pallets in advance really helped out with the build of the planter as it meant we had our timber ready to go. This is something we'd advise doing as it helps if you're building multiple planters.
You'll notice in the photos below that we don't have any liner in our pallets. The liner is effectively a plastic sheet that goes between the wood and your compost/soil, to protect the pallet from rotting in a few years. As we're trying to reduce the amount of plastic used in the garden, we can only use recycled plastic, and we don't have any at the moment. Alternatively, people suggest treating the wood, but we don't want to put any harsh chemicals near to the food we plan to eat! So for now, our only option is to not line the planter and accept in 3-5 years some of the slats might need replacing.
Costs this month
Money
£15 - We bought an apricot tree on a dwarf root stock, meaning it won't grow too big - hopefully not taller than 6ft. Typically apricots don't have much luck in the UK but we thought we'd give it a go!
Time
1 hour building one large recycled pallet-wood planter.
30 minutes planting broad beans saved from last year along with a row of onions, sent to us by the folks at Mr Fothergill's.
The plants - new plants & updates
Below is a list of vegetables that we have planted or sown this month.
Broad Beans - Collected from last year's unwanted crop. The broad beans were the first bean to ready to crop and were delicious in a garden veg soup. We planted 15 of them from seed.
Onions - We planted between 15-20 onion sets, which are mini, not-properly-grown, baby onions. It was as simple as making a shallow trench and popping them in.
Below is a list of fruits that are currently in the garden, ready to start growing in the spring. We will add to this list as the growing season progresses.
Raspberries - Regular, Golden
Plum tree
Cherry tree
Blueberries - Dixi, Legacy, Draper
Redcurrants
Blackcurrants
Goji berry shrub
Strawberries
Figs - Panachee & Brown Turkey
Almond - Dwarf
Peach - Dwarf, great for patios
Red grape vine
What we need to do - March
We're focusing on two things this month. Sowing seeds both outdoors and indoors, and building containers for the fruit & veg that we'll be growing in the summer.
Build Planters. Last month we casually sourced recycled shipping pallets - see last month's blog post here. We've ripped them apart and will now try to build as many planters as we can. It can take a while to take the pallets apart and build a new planter from them - roughly 90 mins, but we've sourced enough (free) timber to make sure we're covered.
Sow Seeds. The weather is getting progressively better. It's getting warmer and there are more hours of daylight. This means we can sow seeds in the ground (broad beans for example) as well as start sowing some seeds indoors. We're not too sure what to sow indoors, but we have some chive seeds, marigold seeds and Borlotti beans available at our disposal. Marigold is a great companion plant for lots of veggies including tomatoes, broccoli, cucumbers, kale. Its flowers mask the smell of the plant for unwanted garden pests.
What's next?
Next month is April. Fruit trees will start to bloom and the risk of frost should be disappearing. This means we'll really be thinking about sowing seeds directly in the ground. We have a bunch that have been sent to us from Mr Fothergill's and D.T. Brown, from carrots to chives - and we're waiting for the right moment to put them in the ground. Once the planters are built it'll be doable, but for now we're still considering what we'll grow.
What one thing should you do in March?
March is a great time to lay down onions, garlic and broad beans. Depending on what you cook at home, these are all tasty options. For us, broad beans are a sweet addition to stews in the spring and early summer. Their flowers attract bees and other pollinators and they grow rapidly (unlike onions or garlic). If we were to suggest one thing you should be planting in March, it would be broad beans! They're very easy to sow, you don't need to care for them and you should see your first leaves in a few weeks.
If you have any tips, suggestions or questions about urban vegetable gardening in the UK I'd love to hear from you!
Thanks for reading,